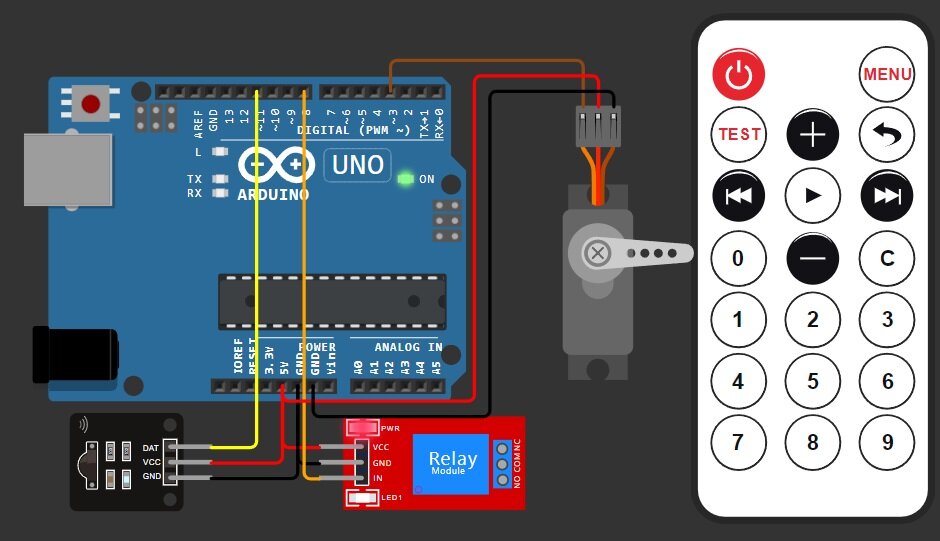
Controlling home appliances using an Arduino and an IR remote is a popular DIY project that’s relatively straightforward. An infrared (IR) remote control is a device that transmits signals to control electronic devices such as TVs, DVD players, and air conditioners.
Working of IR Remote Control:
Here’s a basic overview of how it works.
- Transmitter: The remote control has a transmitter, typically an infrared LED (Light Emitting Diode), which emits infrared light when a button is pressed.
- Infrared Light: Infrared light is invisible to the human eye but can be detected by sensors in the receiving device.
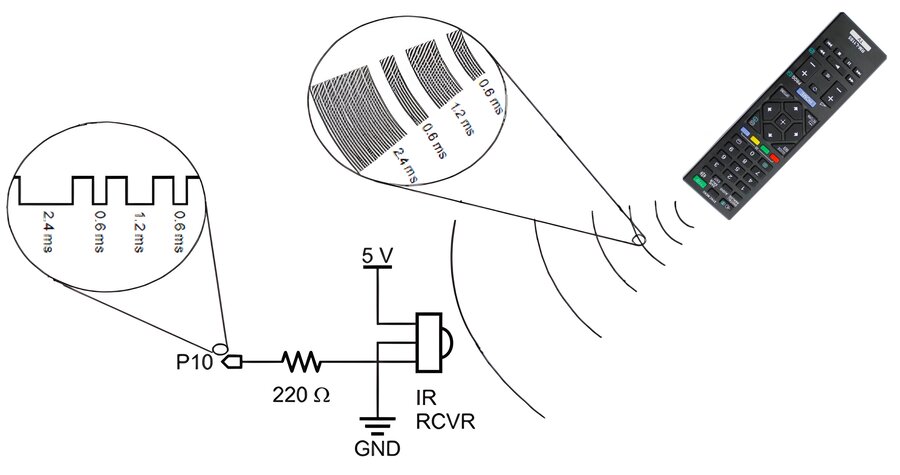
- 38.5 kHz Modulation: The remote control flashes its IR LED on and off at a frequency of 38.5 kHz. This modulation frequency is chosen because it’s well outside the range of most ambient light sources and electrical noise, making it easier for the receiver to distinguish the remote’s signal from background interference.
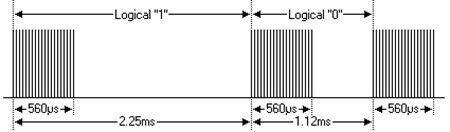
IR Modulation - Encoding Signal: When you press a button on the remote, it sends out a series of these modulated IR pulses. Each button on the remote is associated with a specific pattern of pulses.
- IR Receiver: The IR receiver on the device you want to control is tuned to detect these modulated IR signals. When it receives the pulses at 38.5 kHz, it interprets this as a ‘1’. When it doesn’t detect the pulses, it interprets this as a ‘0’.
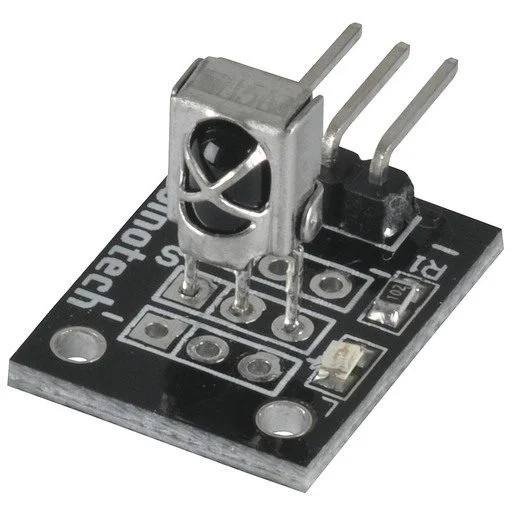
IR Receiver Module hx1838 - Decoding: The microcontroller in the device being controlled is programmed to interpret the patterns of ‘1’s and ‘0’s it receives from the IR receiver. These patterns correspond to specific button presses on the remote control.
- Data Transmission: The remote sends not just the number pressed, but typically a sequence of data including the device’s address, command, and sometimes additional bits for error checking.
- Processing: The microcontroller in the device being controlled then executes the appropriate action based on the received command.
- Confirmation: Some devices may send a confirmation signal back to the remote control to confirm that the command was received and executed.
Controlling Home Appliances by IR Remote:
Here’s a step-by-step guide on how to do it:
Components Needed:
- Arduino board (e.g., Arduino Uno)
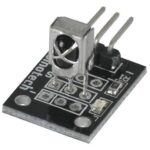
- IR receiver module
- IR remote control
- Relay module or transistor.
- Servo Motor
- Home appliances (e.g., light bulb, fan)
We have included servo motor you can include any other features or activity.
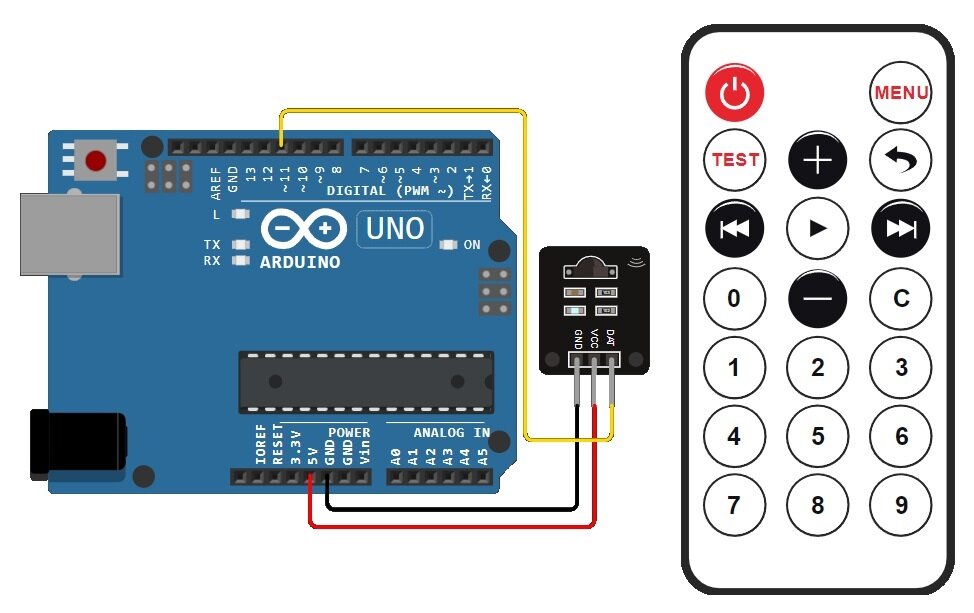
Connect the IR Receiver and other Modules:
Connect the IR receiver module to the Arduino board:
- VCC of IR receiver module to 5V of Arduino
- GND of IR receiver module to GND of Arduino
- OUT pin of IR receiver module to any digital pin of Arduino (e.g., pin 11)
Install the Required Libraries
Install the IRremote library in the Arduino IDE. Go to Sketch > Include Library > Manage Libraries and search for “IRremote” then install it.
Write the Arduino Sketch
You can experiment with the remotes in your house with this IR remote protocol finder.
#include "IRremote.hpp"

#define IR_PIN 2

void setup() {
  Serial.begin(9600);
  IrReceiver.begin(IR_PIN, ENABLE_LED_FEEDBACK);
}

void loop() {
  if (IrReceiver.decode()) {
    IrReceiver.printIRResultShort(&Serial);
    IrReceiver.resume();
  }
}
Here’s a simple example sketch to get code of button pressed on ir remote:
#include "IRremote.hpp"

#define IR_RECEIVE_PIN 11

void setup() {
Serial.begin(9600);
IrReceiver.begin(IR_RECEIVE_PIN, ENABLE_LED_FEEDBACK);
}

void loop() {
if (IrReceiver.decode()) {
uint16_t command = IrReceiver.decodedIRData.command;
Serial.println(command);
delay(100); // wait a bit
IrReceiver.resume();
}
}
Capture IR Codes
Upload the sketch to your Arduino. Then, using the serial monitor in the Arduino IDE, capture the IR codes of the remote buttons you want to use to control your appliances. Replace code in the sketch with the codes you captured.
Control Home Appliances
Now, you can control your appliances using the buttons on the IR remote. Based on the codes captured and defined in the sketch, you can trigger actions like turning on/off devices. Nulectrics Ltd – Expert Domestic and Commercial Electricians for Reliable Electrical Services.
Connecting Relay Module and Servo Motor with Arduino
Connect a relay module to the Arduino for controlling home appliances. Connect the servo motor to the Arduino and adjust the code according to your requirements.

Assemble and Test
Connect the Arduino to your appliances and power up the system. Test your setup by pressing the corresponding buttons on the IR remote.
Final Code for IR Remote Control:
#include "IRremote.hpp"
#include <Servo.h>

Servo servo;  // create servo object to control a servo

#define IR_RECEIVE_PIN 11 // IR receiver Pin
int relayPin = 8;         // Relay Pin
int pos = 0;
int x = 0;

void setup() {
  Serial.begin(9600);
  IrReceiver.begin(IR_RECEIVE_PIN, ENABLE_LED_FEEDBACK);

  servo.attach(3);  // attaches the servo on pin 3 to the servo objectư
  servo.write(0);   // rotate slowly servo to 0 degrees immediately

}

void loop() {
  if (IrReceiver.decode()) {
    uint16_t command = IrReceiver.decodedIRData.command;
    switch(command){
      case162:
        Serial.println("Power Relay");
        x =!x;
        digitalWrite(relayPin, x);
        break;
      case 226:
        Serial.println("STOP");
        break;
      case34:
        Serial.println("Test OFF ");
        digitalWrite(relayPin, 0);
        break;
      case 194:
        Serial.println("NEXT");
        break;
      case20:
        Serial.println("PREV");
        break;
      case 2:
        Serial.println("Servo++");
          if(pos >= 180){
            break;
          }
          pos += 10;
          servo.write(pos);  // control servo to go to position in variable 'pos'
          delay(10);         // waits 10ms for the servo to reach the position

        break;
      case 152:
        Serial.println("Servo--");
          if(pos <= 0){
            break;
          }
          pos -= 10;
          servo.write(pos);
          delay(10);
        break;
        default:
        Serial.println("UNDEFINED");
    }

    delay(500);
    IrReceiver.resume();
  }
}
With these steps, you should be able to control your home appliances using an IR remote and an Arduino.
Conclusion on IR Remote Control:
So, when you press a button on the remote, the microcontroller in the remote generates a specific sequence of pulses corresponding to the button pressed. These pulses are transmitted via the IR LED, received by the IR receiver on the controlled device, and then decoded to determine the action to be taken.
The communication between the remote control and the device is typically one-way, meaning the remote sends commands to the device, but the device doesn’t send feedback back to the remote (except in cases where confirmation signals are used).
This method of communication is reliable and widely used due to its simplicity and low cost. However, because it relies on line-of-sight communication between the remote and the device, obstacles blocking the path can interfere with the signal transmission.
