Creating an altimeter and environment sensor using BME280 and ESP32 microcontroller can be a fun and educational project. The BME280 is a sensor that measures temperature, pressure, and humidity, making it perfect for altitude measurement. Here’s how you can build it:
Components Needed:
- ESP32 development board
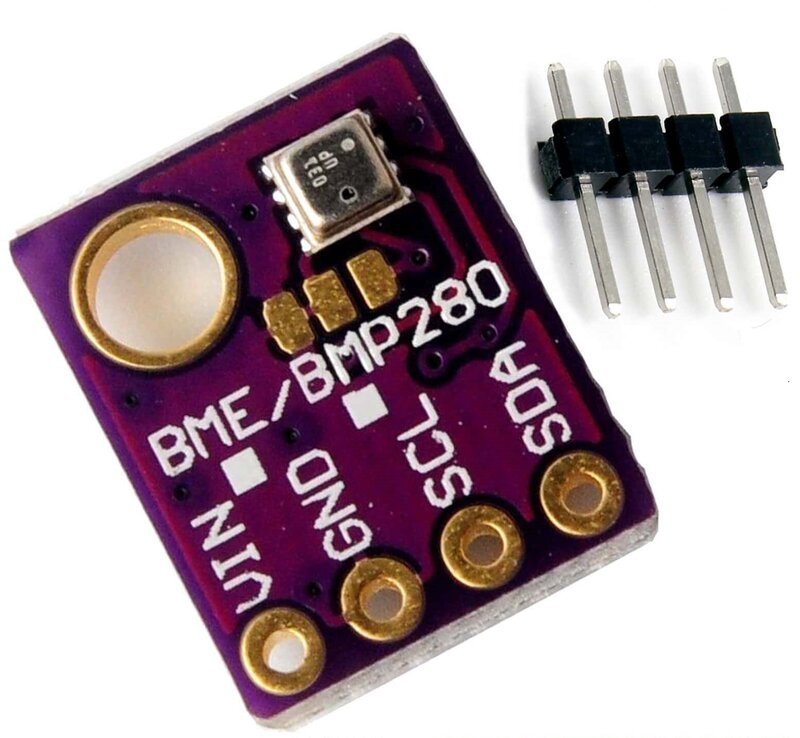
- BME280 sensor module
- Breadboard and jumper wires
- OLED display (optional, for visualizing data)

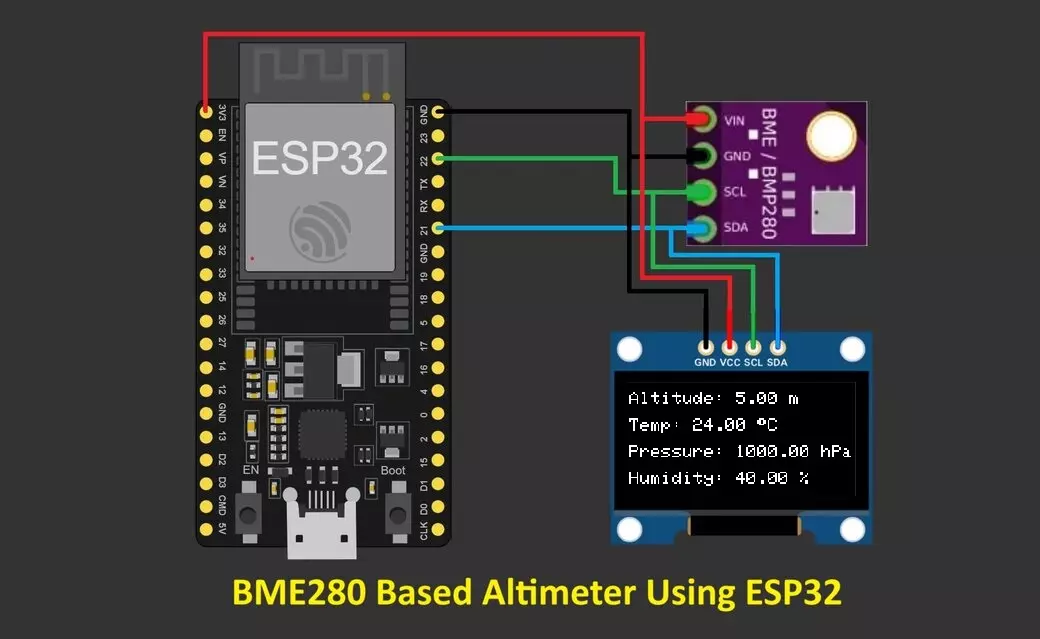
Circuit Diagram: Environment Sensor by BME280 with ESP32
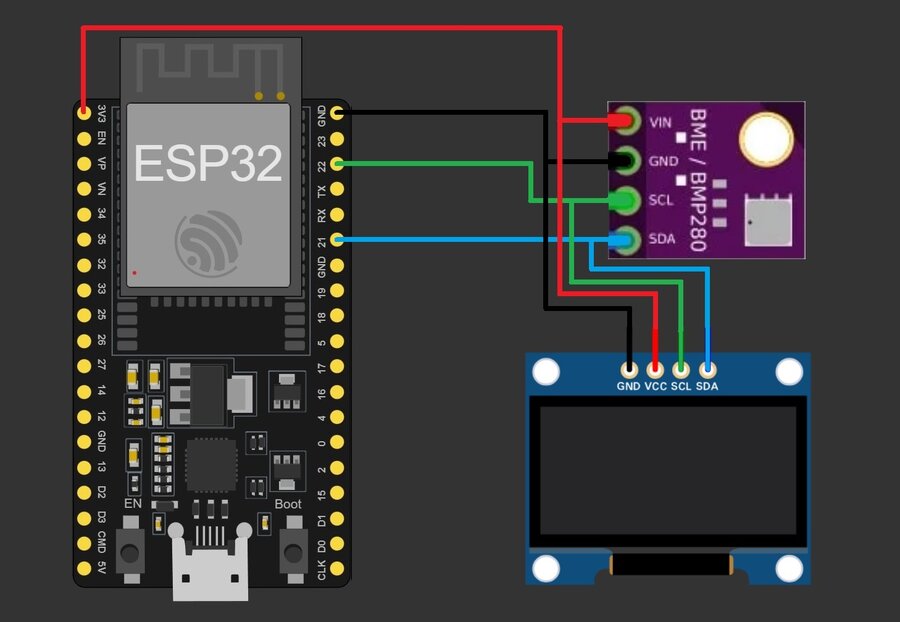
Connecting BME280 sensor with ESP32:
Connect the BME280 sensor and OLED display to the ESP32 following their respective pinout diagrams.
Supply 3.3V from ESP32 to VCC pin of the BME280 and OLED SSD1306.
Provide GND to BME280 and OLED SSD1306 from GND pin of the ESP32.
Connect the SCL pin of the OLED SSD1306 and BME280 to the SCL pin (GPIO pin 22) of the ESP32.
Connect the SDA pin of the SSD1306 OLED display and BME280 to the SDA pin (GPIO pin 21) of the ESP32.
Ensure that the BME280 is powered and connected to the ESP32 via I2C, and the OLED display is also connected.
Install Required Libraries:
Use the Arduino IDE or Platform IO to Install the necessary libraries for the BME280 sensor, OLED display, and ESP32 board. You can use libraries like Adafruit_BME280, Adafruit_Sensor, Adafruit_GFX, and Adafruit_SSD1306.
Code of BME280 Based Altimeter:
Here’s a code to get altitude data from the BME280 sensor and display it on the serial monitor:
#include <Wire.h>
#include <Adafruit_Sensor.h>
#include <Adafruit_BME280.h>

#define SEALEVELPRESSURE_HPA (1013.25)

Adafruit_BME280 bme; // I2C

void setup() {
Serial.begin(9600);
while (!Serial);

if (!bme.begin(0x76)) {
Serial.println("Could not find a valid BME280 sensor, check wiring!");
while (1);
}
}

void loop() {
float temperature = bme.readTemperature();
float pressure = bme.readPressure() / 100.0F; // hPa to Pa
float altitude = bme.readAltitude(SEALEVELPRESSURE_HPA);
float humidity = bme.readHumidity();

Serial.print("Temperature = ");
Serial.print(temperature);
Serial.println(" *C");

Serial.print("Pressure = ");
Serial.print(pressure);
Serial.println(" Pa");

Serial.print("Approx. Altitude = ");
Serial.print(altitude);
Serial.println(" m");

Serial.print("Humidity = ");
Serial.print(humidity);
Serial.println(" %");

Serial.println();

delay(2000);
}
Explanation:
- Import necessary libraries: Wire.h for I2C communication, Adafruit_Sensor.h, and Adafruit_BME280.h for the BME280 sensor.
- Define the sea level pressure as a constant.
- Initialize the BME280 sensor in the
setup()function. Make sure to provide the correct I2C address (0x76 for BME280). - In the
loop()function, read temperature, pressure, altitude, and humidity using the BME280 sensor methods. - Print these values to the Serial Monitor every 2 seconds.
OLED Display:
Here’s the code to get altitude data from the BME280 sensor and display it on the OLED screen:
#include <Wire.h>
#include <Adafruit_Sensor.h>
#include <Adafruit_BME280.h>
#include <Adafruit_GFX.h>
#include <Adafruit_SSD1306.h>

#define SCREEN_WIDTH 128
#define SCREEN_HEIGHT 64
#define OLED_RESET -1

Adafruit_BME280 bme;  // I2C

#define ALTITUDE_SEA_LEVEL 1013.25 // Adjust according to your location

Adafruit_SSD1306 display(SCREEN_WIDTH, SCREEN_HEIGHT, &Wire, OLED_RESET);

void setup() {
  Serial.begin(9600);

  if (!bme.begin()) {
    Serial.println("Error, check wiring!");
    while (1);
  }

  if(!display.begin(SSD1306_SWITCHCAPVCC, 0x3C)) {
    Serial.println(F("SSD1306 allocation failed"));
    for(;;);
  }

  display.display();
  delay(2000);
  display.clearDisplay();
}

void loop() {
  display.clearDisplay();

  float temperature = bme.readTemperature();
  float pressure = bme.readPressure() / 100.0F; // hPa
  float altitude = bme.readAltitude(ALTITUDE_SEA_LEVEL);
  float humidity = bme.readHumidity();

  display.setTextSize(1);
  display.setTextColor(SSD1306_WHITE);
  display.setCursor(0,0);

  display.print("Altitude: ");
  display.print(altitude);
  display.println(" m");

  display.print("Temp: ");
  display.print(temperature);
  display.print(" ");
  display.print((char)247);
  display.println("C");

  display.print("Pressure: ");
  display.print(pressure);
  display.println(" hPa");

  display.print("Humidity: ");
  display.print(humidity);
  display.println(" %");

  display.display();
  delay(2000); // Adjust delay as needed
}
Upload the Code:
Connect your ESP32 to your computer and upload the code using the Arduino IDE or any other preferred method.
Test the Project:
After uploading the code,
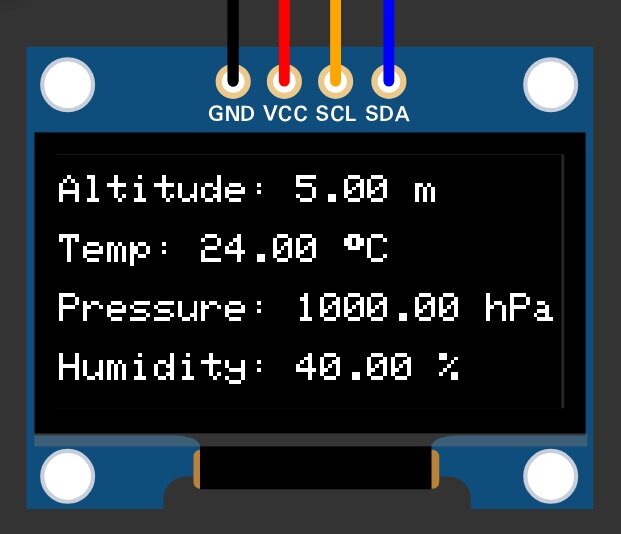
Open the serial monitor, and you should see the Altitude, Temperature, Pressure and Humidity data being printed.
If display is connected you should see Altitude, Temperature, Pressure and Humidity readings displayed on the OLED screen.
Notes:
- Ensure that your BME280 sensor is properly connected and that you have installed the required libraries.
- The altitude calculation depends on the sea-level pressure. Adjust the value
bme.readAltitude(1013.25)according to your local sea-level pressure for accurate altitude readings.
Enhancements:
You can add additional features such as calibration, data logging, wireless transmission of data, or user interface improvements to make your altimeter project more functional and user-friendly.
This project is a great way to learn about working with sensors, microcontrollers, and displays, as well as understanding altitude measurement and its applications.
Projects on BME280:
The BME280 sensor is a versatile environmental sensor that measures temperature, humidity, and pressure. Here are some project ideas utilizing the BME280 sensor:
Weather Station:
Build a weather station that continuously monitors temperature, humidity, and pressure using the BME280 sensor. You can display the data on an LCD screen or stream it to a web server for remote access.
Indoor Climate Monitoring:
Create a system to monitor the indoor climate of your home or office. Use the BME280 sensor to measure temperature and humidity levels and set up alerts if certain thresholds are exceeded.
Altitude Logger:
Develop a device that logs altitude changes using the BME280 sensor. This could be useful for hikers, climbers, or drone enthusiasts who want to track their elevation changes over time.
Air Quality Monitor:
Combine the BME280 sensor with additional sensors (like MQ series gas sensors) to create an air quality monitoring device. Measure parameters such as temperature, humidity, pressure, and air pollutants to assess indoor or outdoor air quality.
Automated Plant Watering System:
Use the BME280 sensor to monitor the moisture level of soil in a plant pot. When the soil becomes too dry, trigger a water pump to water the plant automatically.
Smart Thermostat:
Integrate the BME280 sensor into a smart thermostat system to accurately measure indoor temperature and humidity levels for precise climate control.
Environmental Data Logger:
Build a portable data logger that records temperature, humidity, and pressure readings at regular intervals. This data can be stored locally on an SD card and later analyzed on a computer.
IoT Weather Balloon:
Create a weather balloon equipped with a BME280 sensor to collect atmospheric data at various altitudes. Transmit the data wirelessly to a ground station for real-time monitoring and analysis.
Predictive Maintenance System:
Use the BME280 sensor to monitor environmental conditions in machinery or equipment. Detect changes in temperature, humidity, or pressure that could indicate potential maintenance issues.
Flight Recorder for Model Aircraft:
Install the BME280 sensor in a model aircraft to record flight data such as altitude, temperature, and humidity. This can help hobbyists analyze flight performance and conditions.
When working on these projects, be sure to check the BME280 sensor’s datasheet for accurate specifications and interfacing instructions with your microcontroller or development board.
ESP32 Home Automation Project by Google Assistant, Blynk & IFTTT
